Interior Design
Maximising space
Interior Design | Project Lead | 11 months

The Challenge
Updating a one bedroom art deco apartment with a dated 60's renovation, to create a functional, spacious, sympathetic space for the current tenant, and the owners to retire in later down the line.
Approach
The bathroom and kitchen were the areas we could make the most impact. Being tight spaces, and working within the existing structure, the initial space planning had to be pretty accurate to ensure everything would fit. We knew that cleverly designed joinery would help fit a lot in, while adjustable pieces would allow us to achieve all the functions the clients required.

Drawing on the building itself.
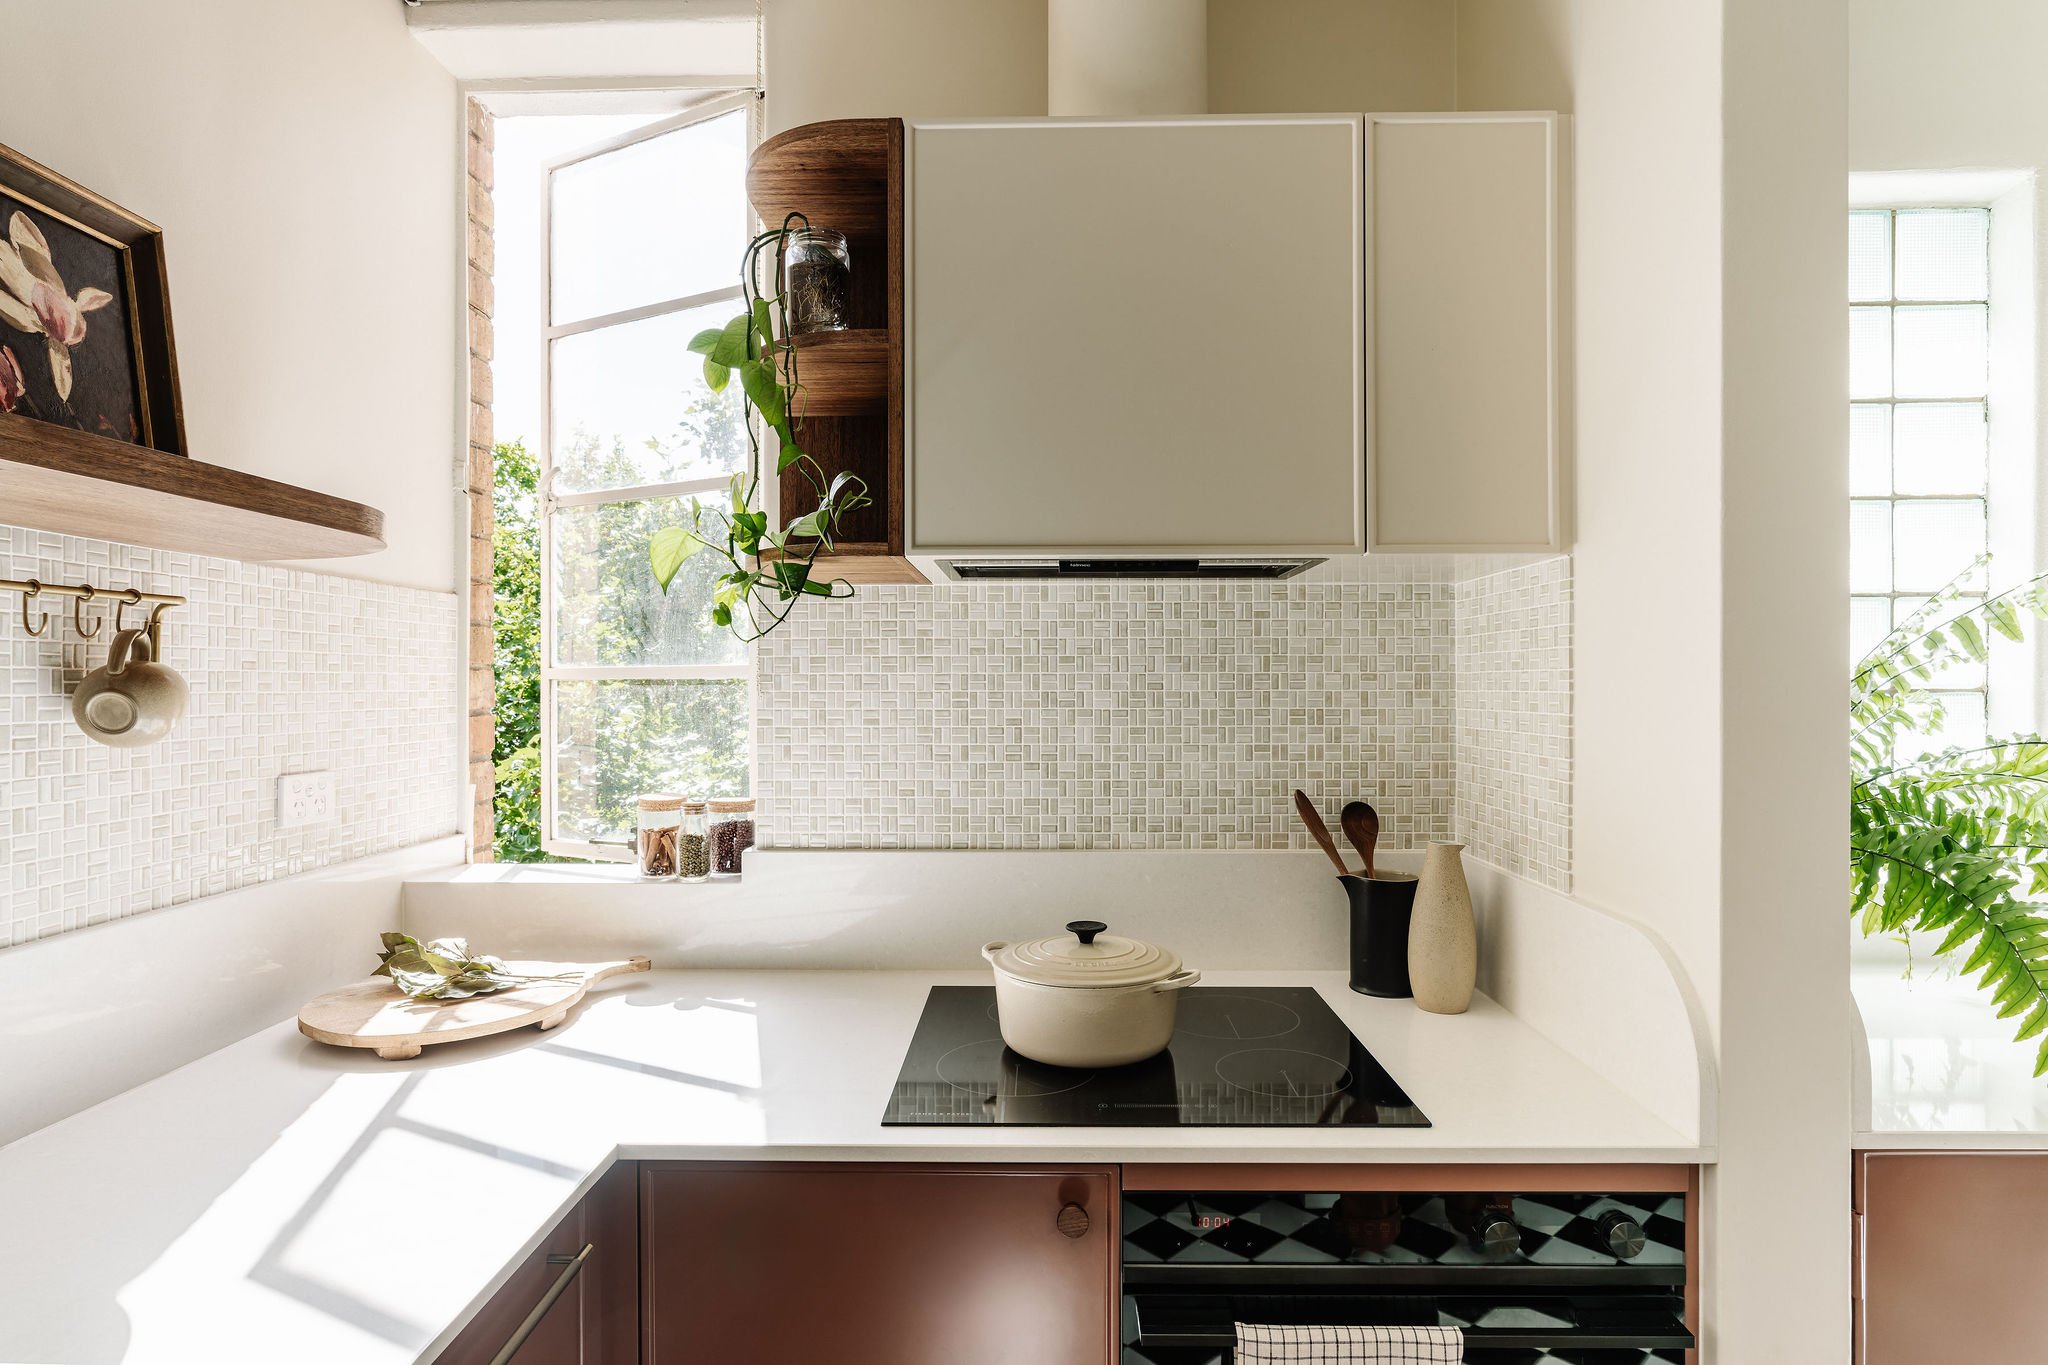
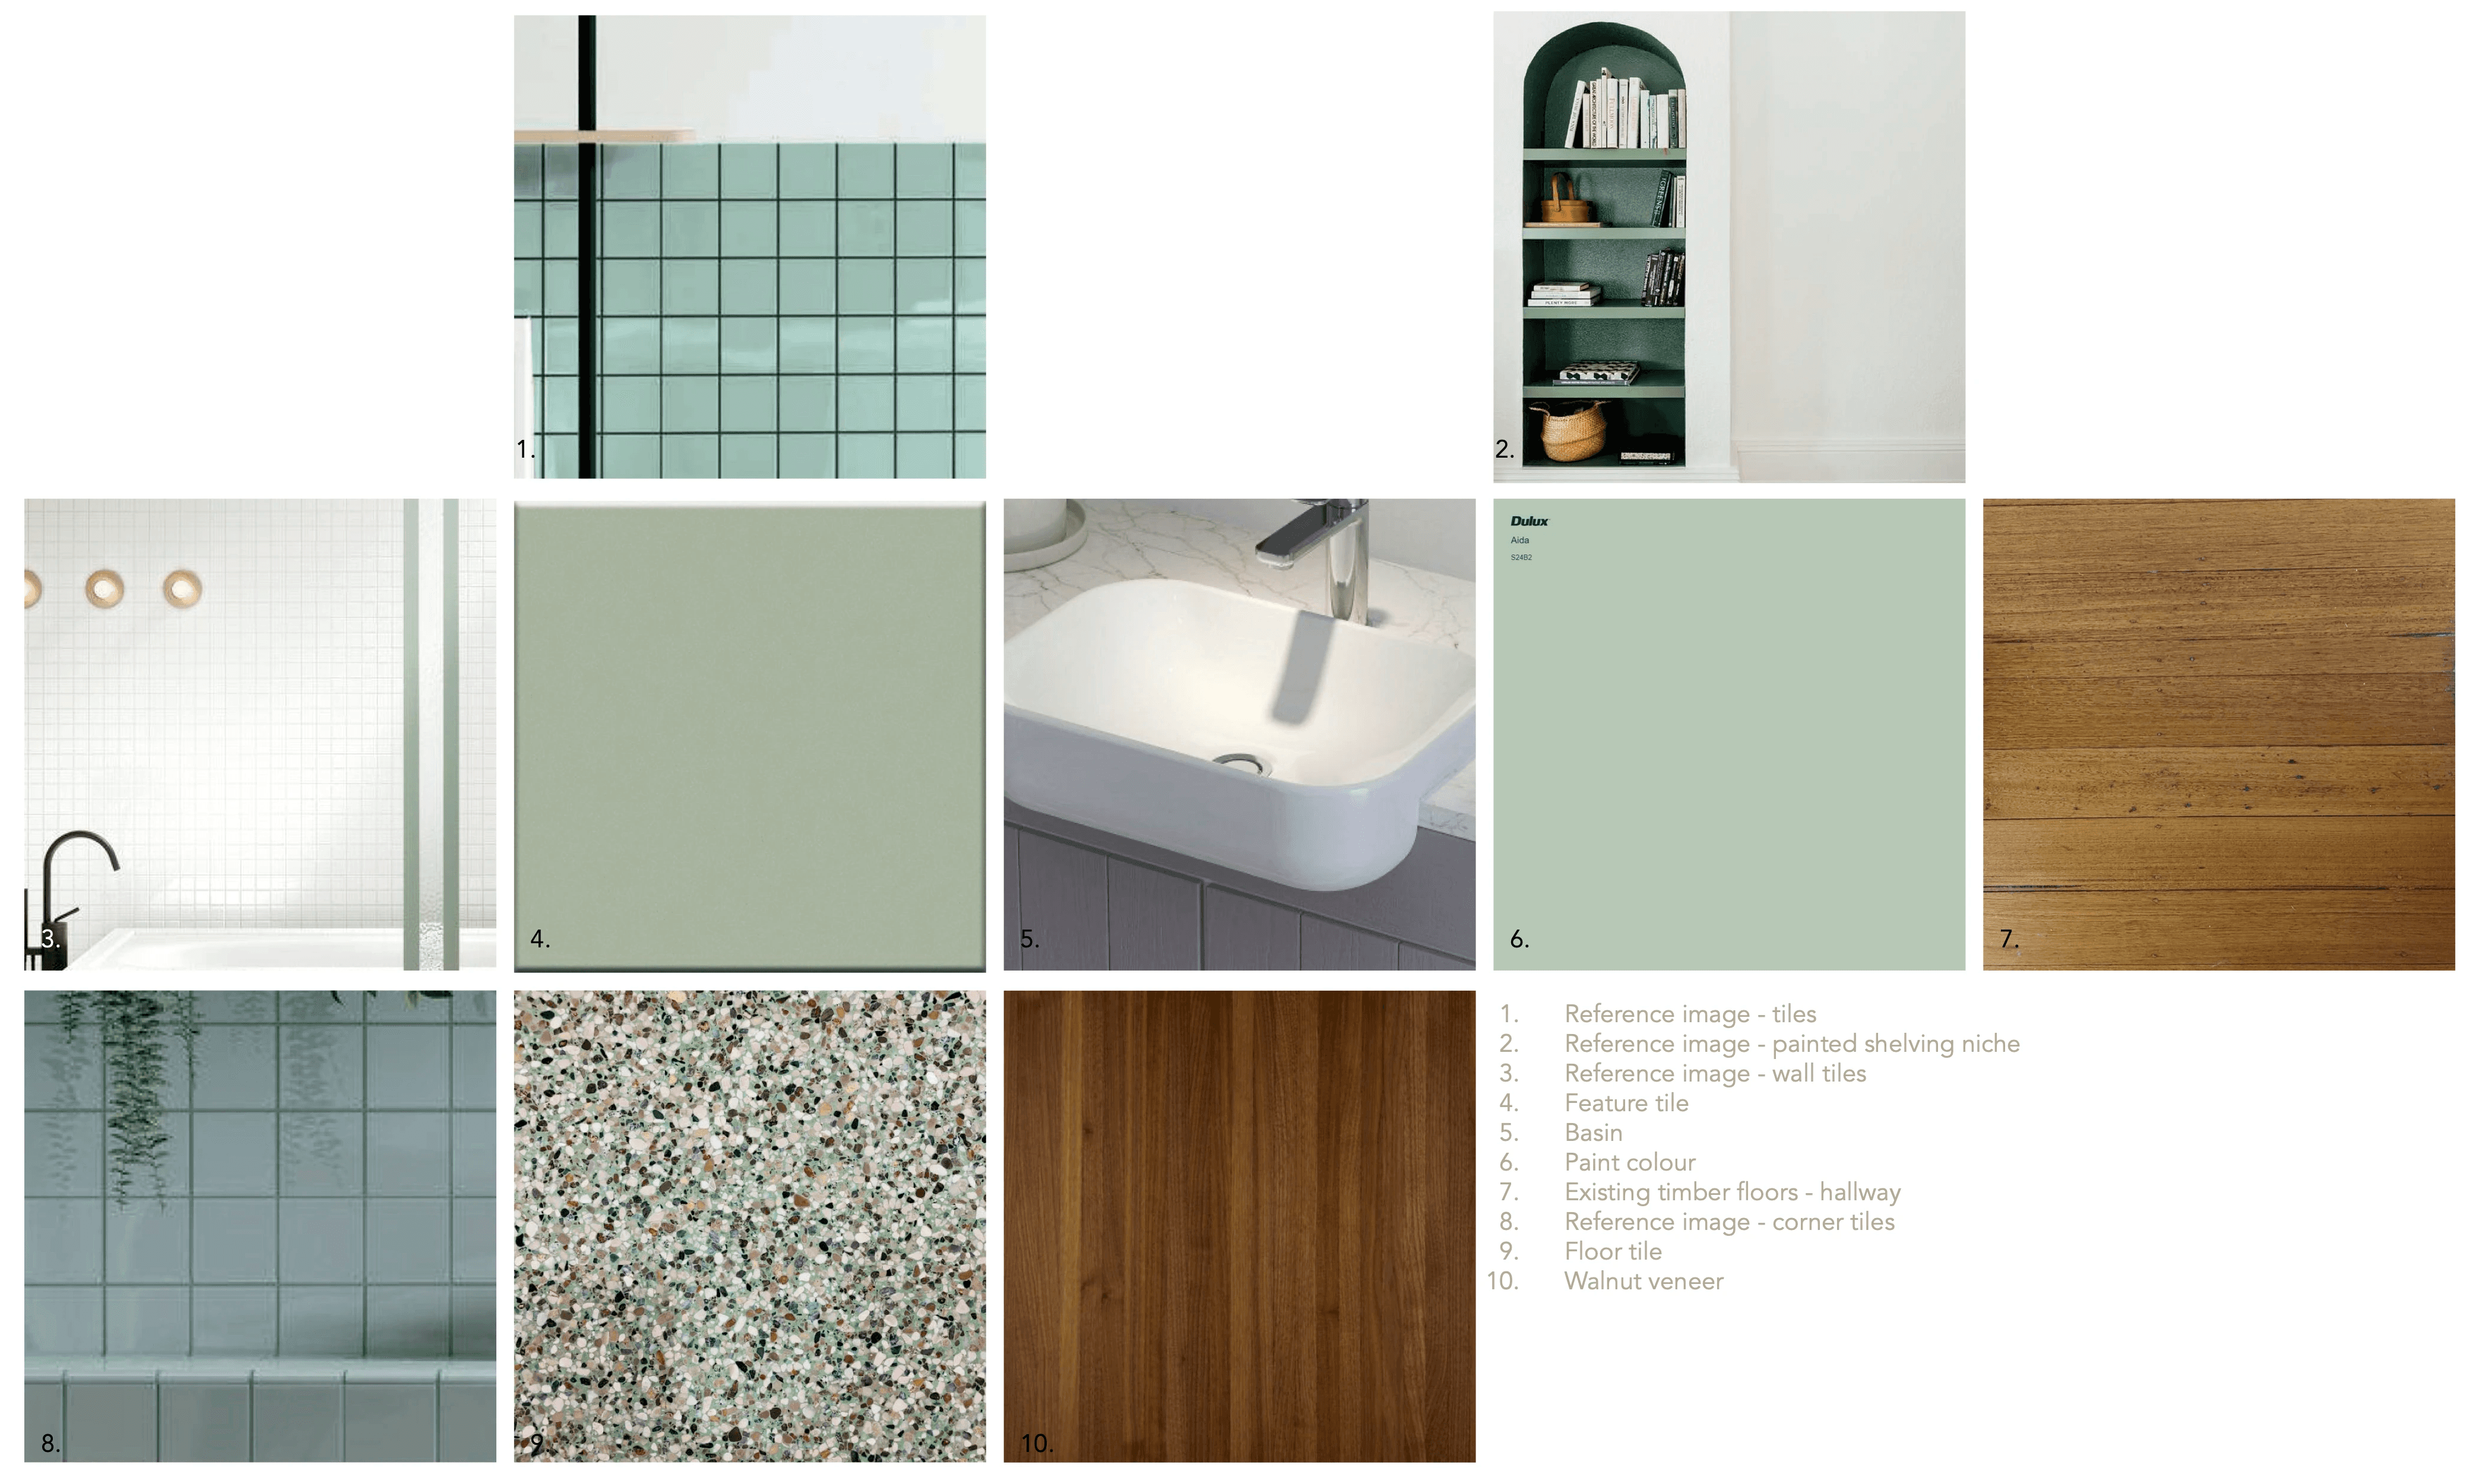
The exterior of the building had some strong curved elements, which we brought into the apartment. These referenced the architecture, but were also practical spatially, creating a more seamless flow throughout. The colour palette we ended up implementing was also pulled from elements of the building - green and turquoise marble and tiles, and a deep red brick.

Client feedback and design development.
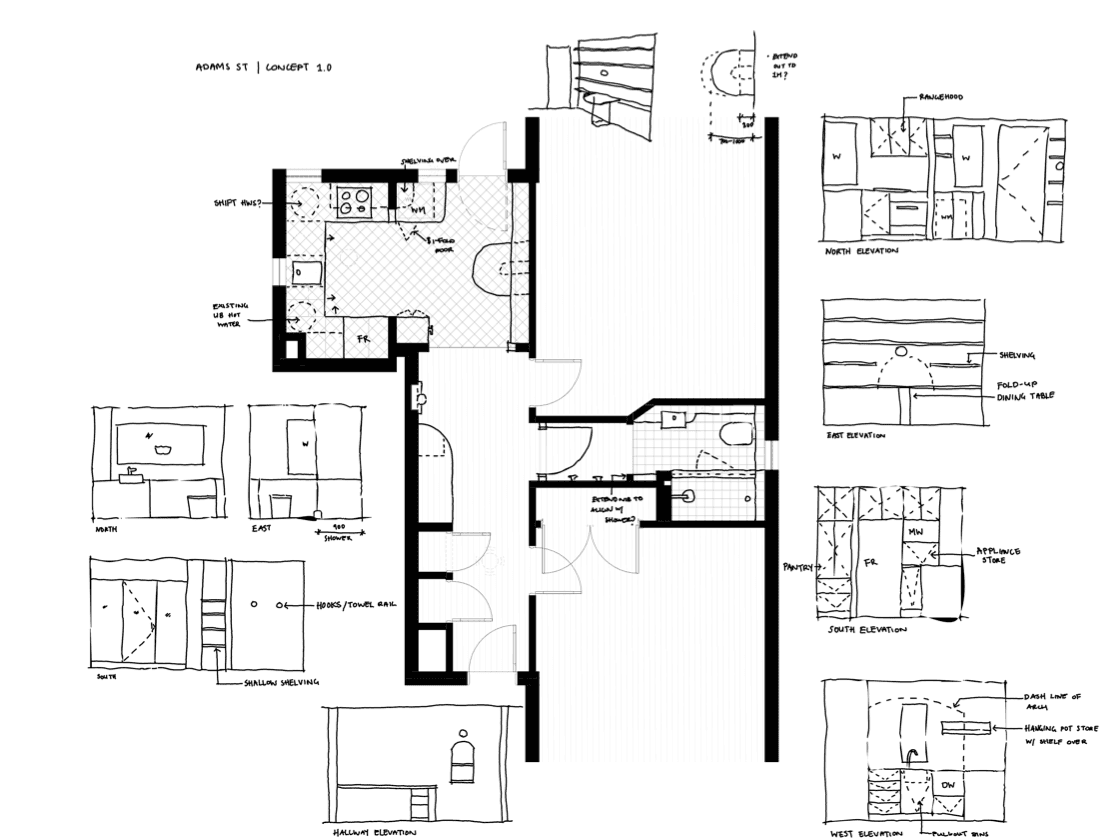
Based on client feedback from the initial concept presentation, we had a layout to progress with, and some material options to explore. I took the floorplan into revit and prepared the drawings for construction.


Don't relocate bathroom door
Avoid any structural changes if they don't make a huge difference.
Not sure about colours for materials
Can't visualise the colours, but like the idea of neutrals and drawing from the building.
Happy with concealed appliances
Understand these will make the space feel more spacious and cohesive.
Demolition reveals what was previously hidden.
Demolition revealed some good things, and some less than ideal. The bathroom actually had two layers of thick tiles on the floor and walls, so getting rid of these gained us precious extra space, which opened up the options for the shower design. The kitchen, turned out, revealed that it's original layout from the 1930s, was very similar to what he had planned the new layout to be. However, the location of the old woodfire oven was just so slightly off from where we had the oven going, which meant some juggling and concealing of venting to connect into the existing cavity.

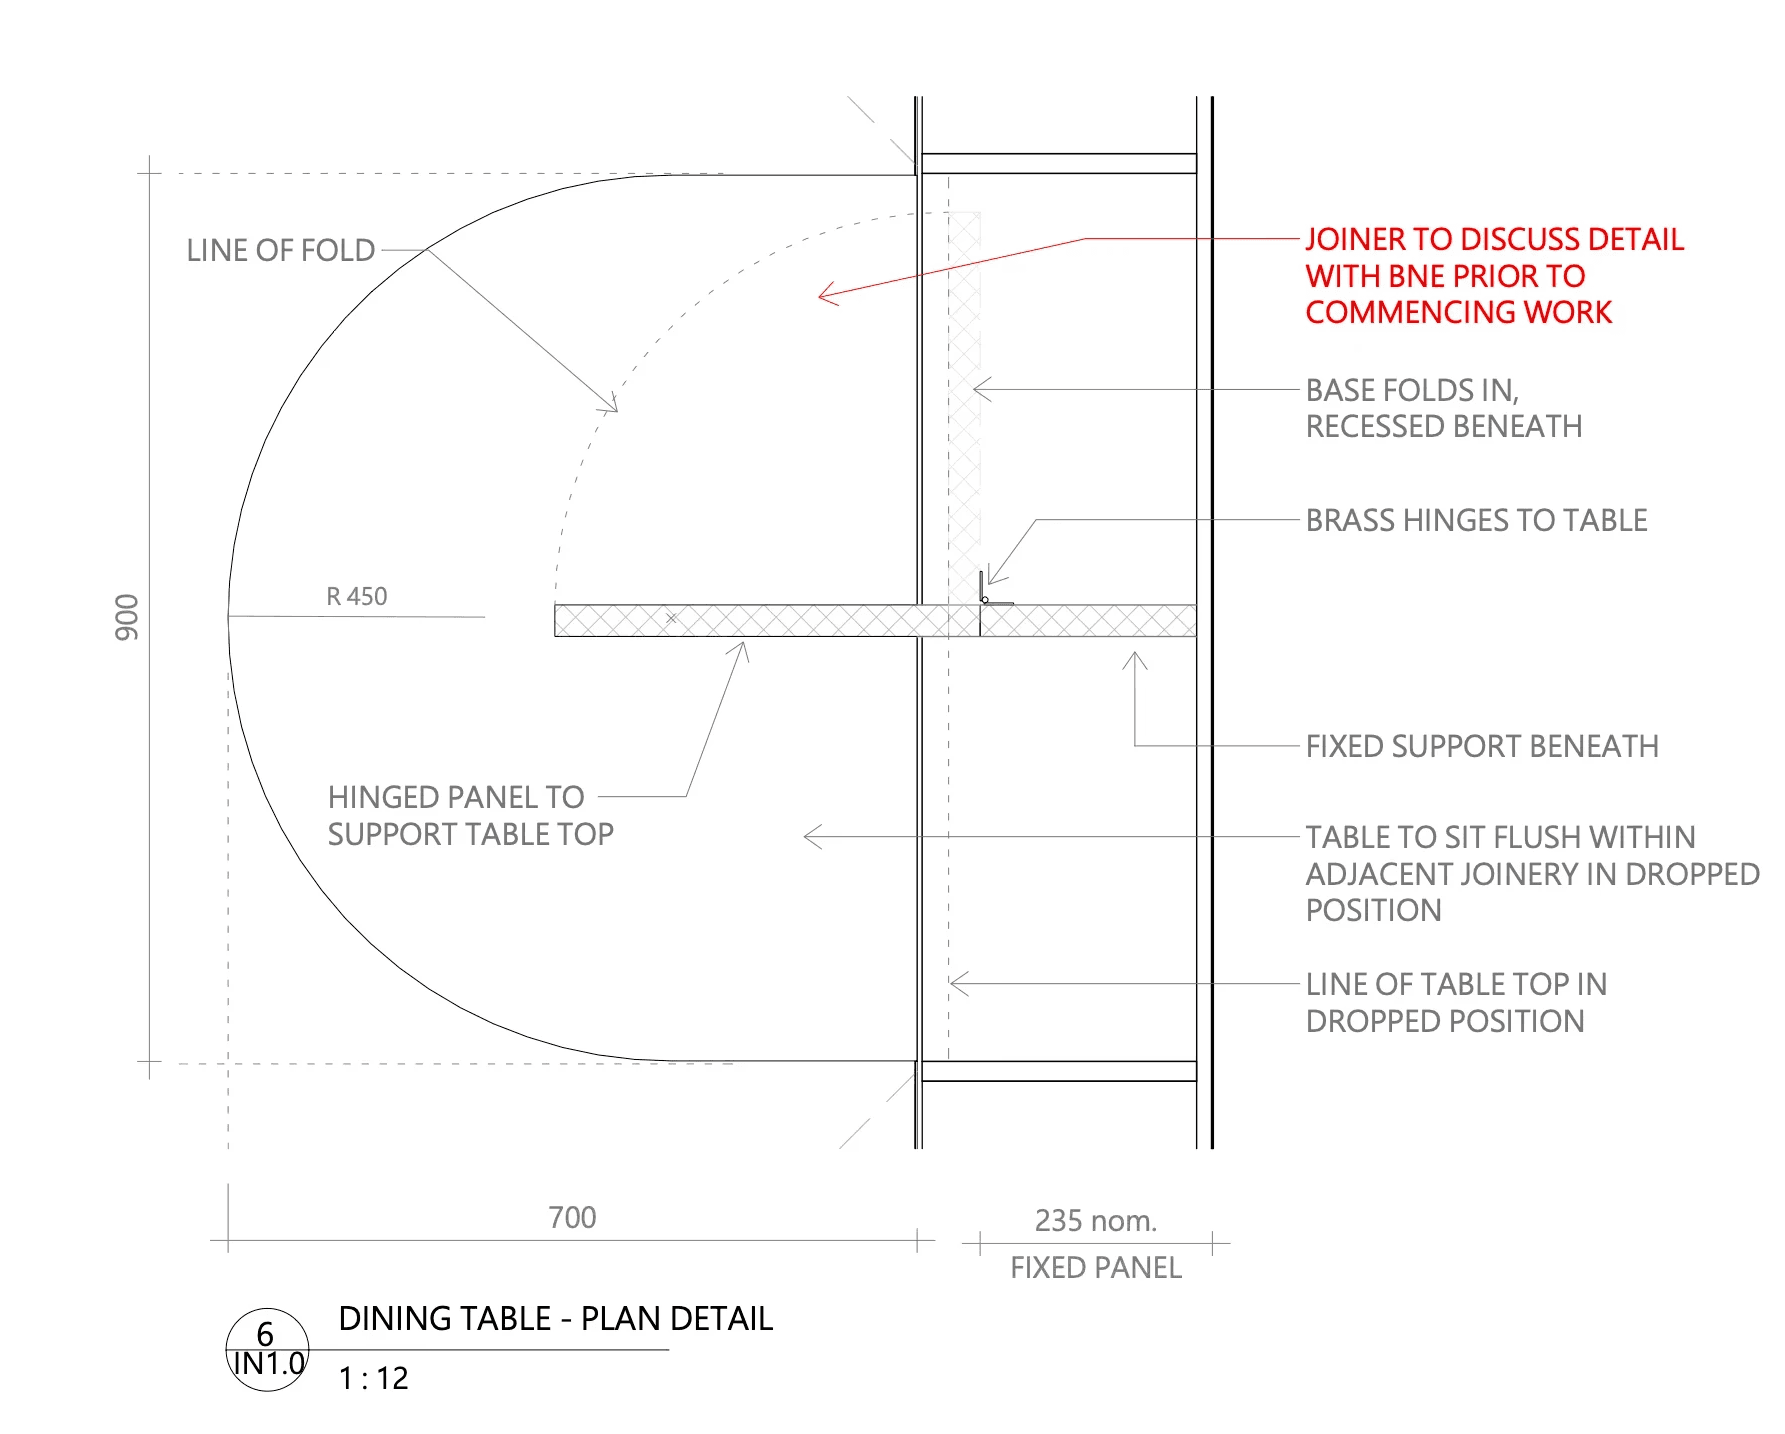
It's all in the detail.
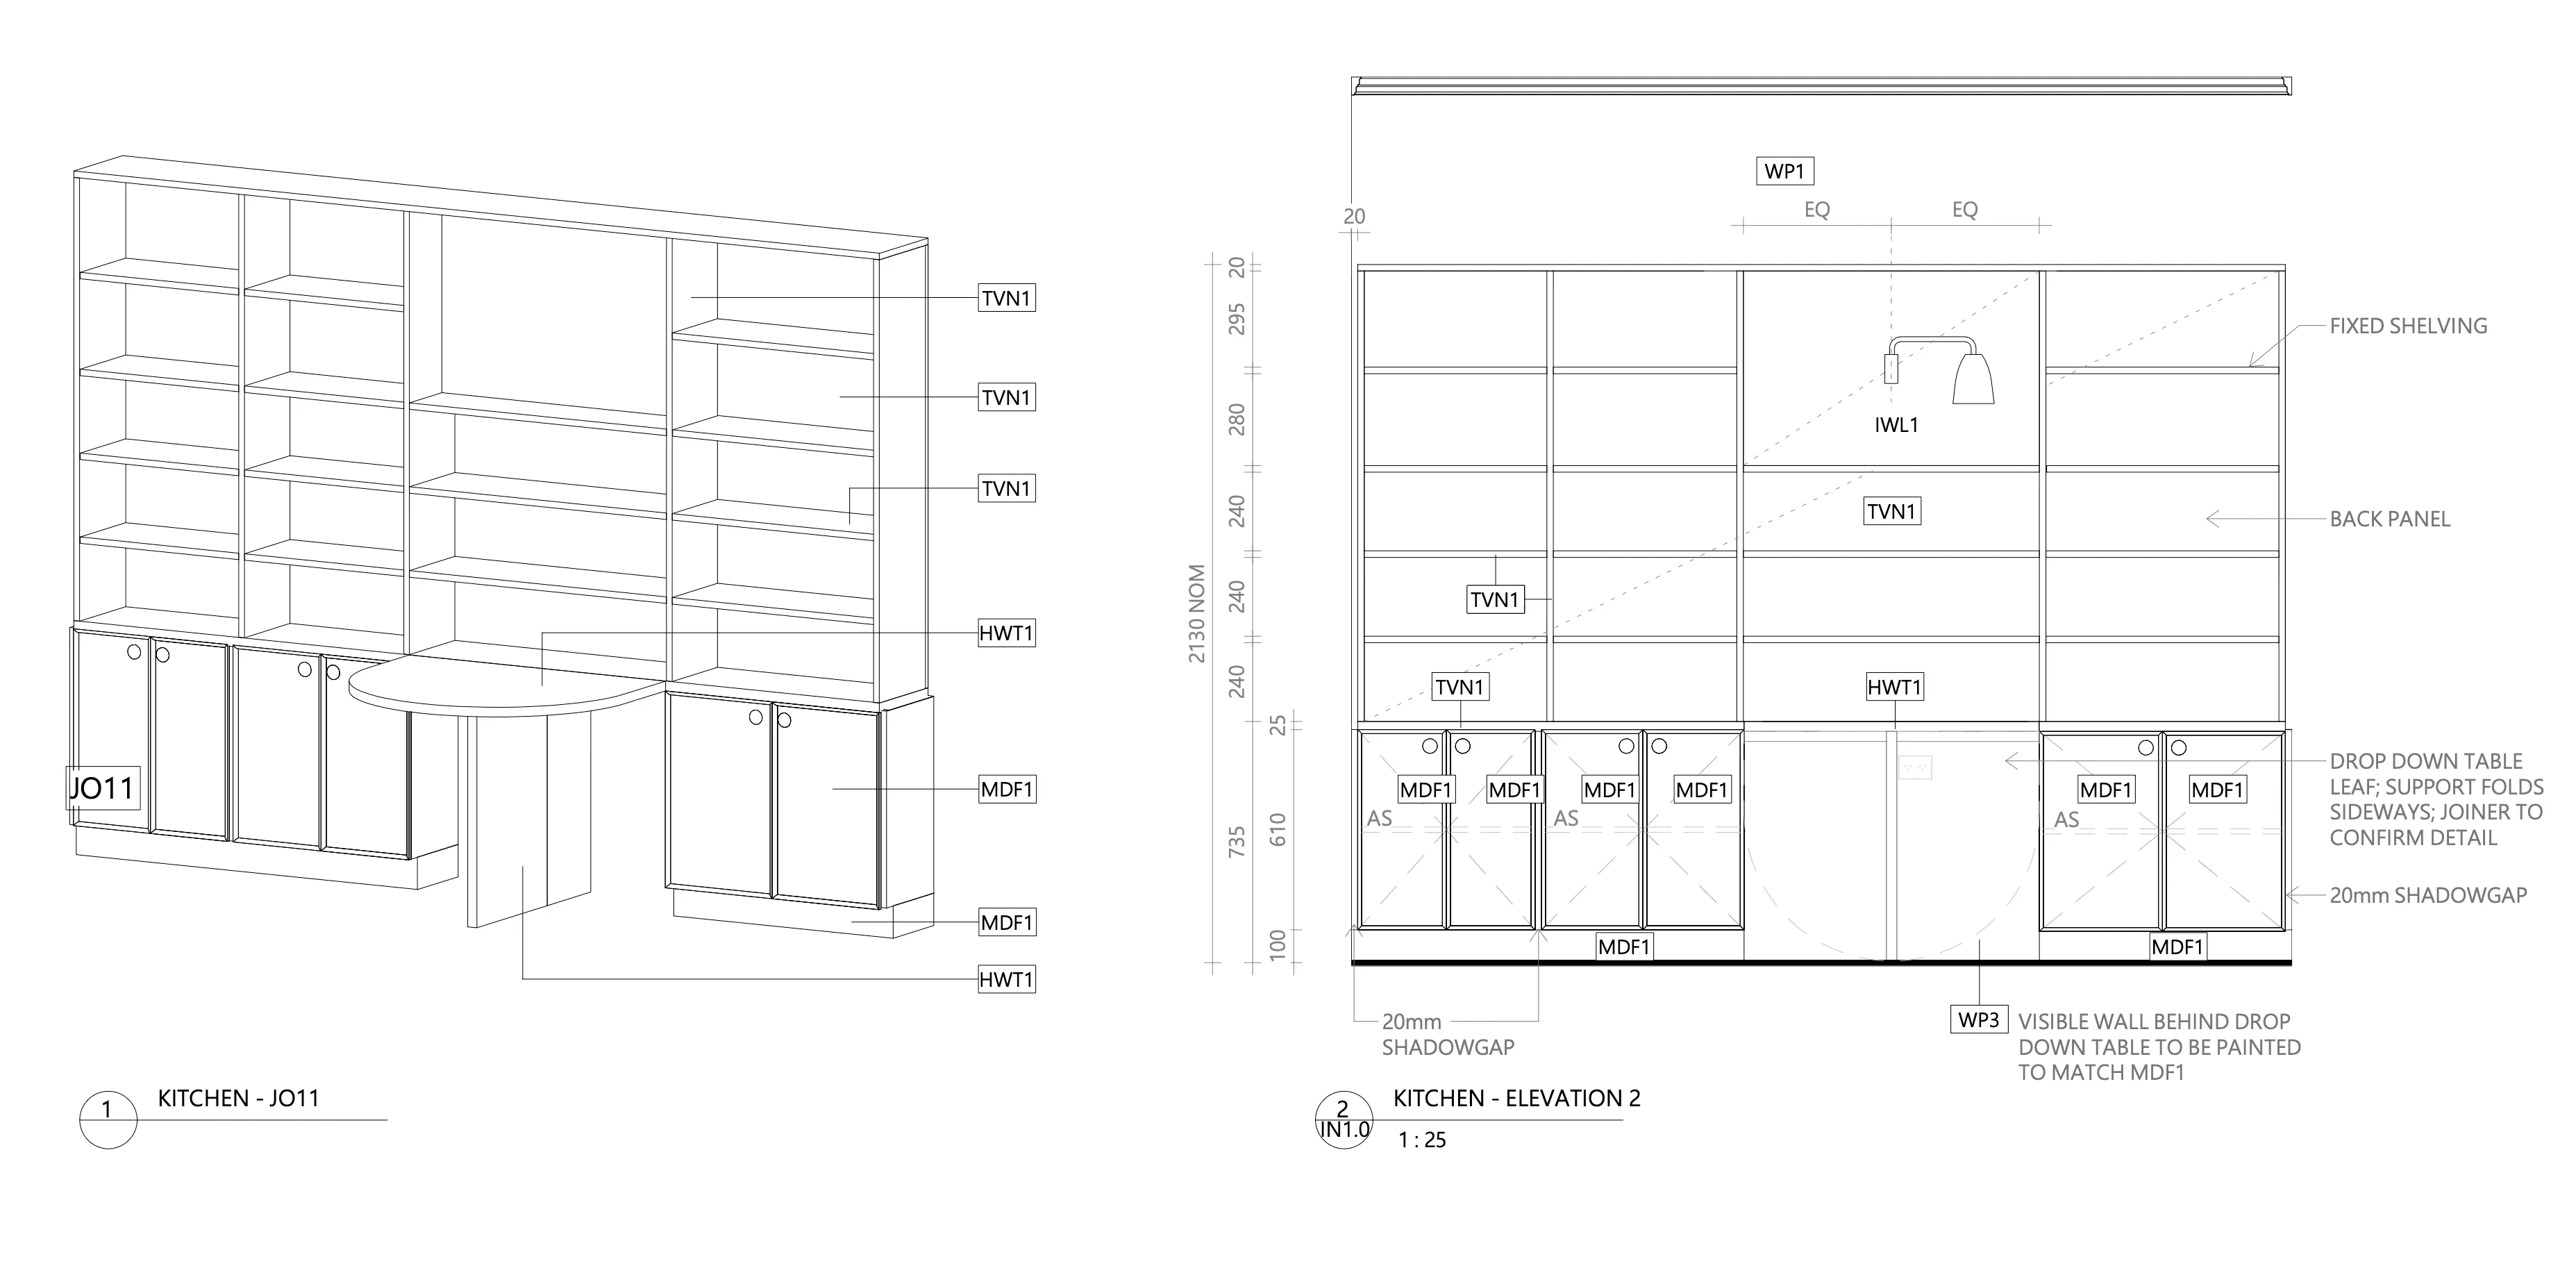
A wall of built in shelving along the eastern wall of the kitchen made use of a shallow area behind the door. It added much needed shortage, and also housed a drop down dining table. Easily propped up to seat 4 people when needed - it stored flat when not required to create a larger walkway to the back door.

Solution
There were plenty of on the spot iterations to the design as things came up on site. Details were worked out directly with the joiner and builder. While the documentation prepared was to communicate design intent to the builder, nothing beat a phone call or a site visit to quickly work through the bits and pieces that came up along the way. Materials were viewed onsite, as short timeframes meant substituting many items based on availability.


Outcome
Construction completed in time for Christmas, and a very happy tenant - the clients' daughter - moved back in. The hugely increased amount of storage space was much appreciated, along with the spaces looking cleaner and more sympathetic to the era of the building. Not to mention, a walk in shower.